Introduction
USB splitters have become a popular solution for connecting multiple devices to a single USB port. As technology advances, the need for connection versatility increases, prompting questions about the maximum number of devices that can be connected to a USB splitter. Understanding the limitations and possibilities of USB splitters can help you make informed decisions regarding device management.
| USB Standard | Max Devices | Power Supply | Data Speed |
|---|---|---|---|
| USB 1.1 | 127 | Low Power (100mA per device) | 1.5 Mbps (Low Speed), 12 Mbps (Full Speed) |
| USB 2.0 | 127 | Up to 500mA per device | 480 Mbps |
| USB 3.0 | 127 | Up to 900mA per device | 5 Gbps |
Understanding USB Splitters
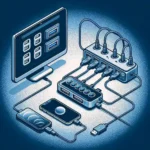
A USB splitter allows for the expansion of a single USB port into multiple ports. This way, multiple devices can share a single connection to the host device, such as a laptop or desktop computer. However, certain factors influence how many devices can effectively operate simultaneously through a splitter.
Key Factors Affecting Device Connections
- USB Standard: Different USB standards have varying capabilities. The two most common standards are USB 2.0 and USB 3.0, each with different power outputs and data transfer speeds.
- Power Requirements: Devices have varying power needs. For example, external hard drives may require more power than a standard keyboard or mouse. Using a powered USB hub can alleviate power limitations.
- Bandwidth Limitations: Even though USB can support multiple devices, the total bandwidth is shared among all devices connected to the splitter, which can slow down data transfer rates.
- Device Compatibility: Ensure that all devices connected to the splitter are compatible with the specifications of the splitter itself, including necessary drivers and operational requirements.
Different Types of USB Splitters
Passive vs. Active USB Splitters
USB splitters are available in passive and active forms. Understanding the differences between these two types is crucial:
- Passive USB Splitters: These do not require an external power source. They rely solely on the host device for power and are typically used for low-power devices. The primary limitation of passive splitters is power distribution.
- Active USB Splitters: These require an external power supply, allowing them to power multiple devices more effectively. Active splitters maintain the data transfer capabilities while ensuring that all connected devices receive sufficient power.
Calculating the Maximum Number of Devices
Using an Example
To illustrate how to calculate the maximum number of devices you can connect to a USB splitter, let’s assume you are using a USB 2.0 active splitter. USB 2.0 allows 500mA of power per port and supports up to 127 devices theoretically. However, several factors must be considered:
- If your splitter has 4 ports, and you’re connecting devices that each require 150mA of power, the power consumption would total 600mA. This means you may only be able to connect 3 devices effectively (at 150mA each).
Practical Considerations
Here are some practical considerations when connecting devices through a USB splitter:
- Prioritize which devices are critical. Connect essential devices first, ensuring ample power for each connected hardware.
- Consider using a powered USB hub for devices that require more power.
- Monitor the data performance when connecting multiple high-bandwidth devices, like external drives and cameras.
Practical Tips for Using USB Splitters
Choosing the Right Splitter
Selecting the appropriate USB splitter is integral to ensuring optimal performance:
- Check Specifications: Ensure the splitter meets your device’s needs regarding power and data transfer speeds.
- Read Reviews: Look for user reviews regarding the performance of specific USB splitters, especially concerning connection stability.
Improving Device Performance
- Regularly monitor your device connections; if you notice lag or slow performance, it may be time to reconsider connections.
- Keep the USB firmware updated, as newer updates may improve performance and compatibility.
Conclusion
While theoretically, 127 devices can be connected via USB splitters, various factors dictate the feasible number of devices that can operate efficiently. Factors such as power requirements, data bandwidth, and splitter types play significant roles in maximizing your USB connections. Understanding these elements helps ensure that you can manage your devices effectively without compromising performance.